Hi! 👋 Do you want to add a chat with clients directly via WhatsApp to your blog in Blogger.com ? Great idea! With the WApp Chat widget, this is possible in a couple of minutes without dancing with a tambourine and without knowing the code.
Before you begin, make sure you've created your widget and copied the installation code from your WApp Chat dashboard
Step-by-step guide for getting the code of the Wapp Chat widget
Choose the widget display that suits you
Install to the single page
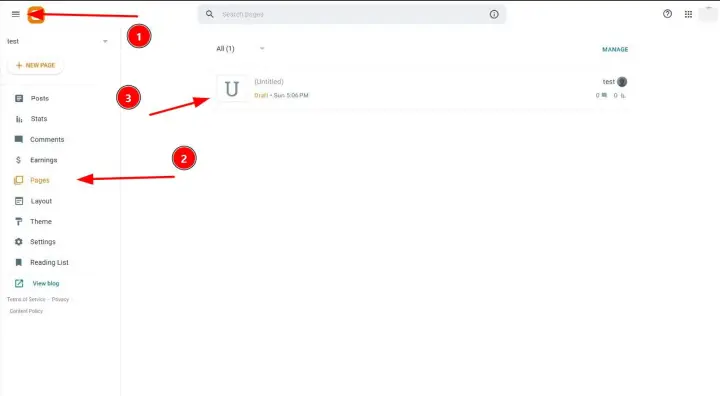
Log in to your Blogger account. In the left menu, find the Pages section. Click on it.
You will see a list of all the pages on your blog. Select the one where you want to place the widget. If there is no page yet, create it (the Create page button).
Step 1: Go to the Blogger admin panel and open the desired page
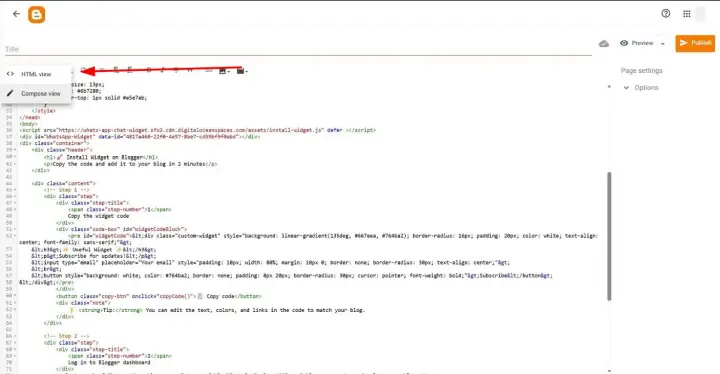
When the page is open for editing, look in the upper-left corner. There is an icon < > or a pencil icon. Click on it and select HTML Mode (< >).
The source code of the page opens in front of you. Don't worry, we'll just insert one line there.
Step 2: Switch the editor to HTML mode
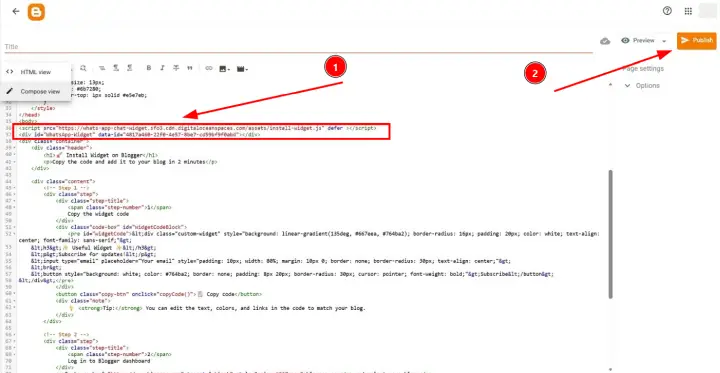
Now copy the installation code from your personal account of the WApp Chat. Find the
tag and paste the code immediately after it. Click the Update or Save button.
Step 3: Insert the widget code
Open your blog in a new browser tab (preferably in incognito mode, so as not to see the old cached version). Go to the page where you added the code. You should see the chat icon. Click on it to open the WhatsApp window? Congratulations, everything is working! 🎉
Step 4: Check the result
Install to the All pages
Installation on all blog pages.
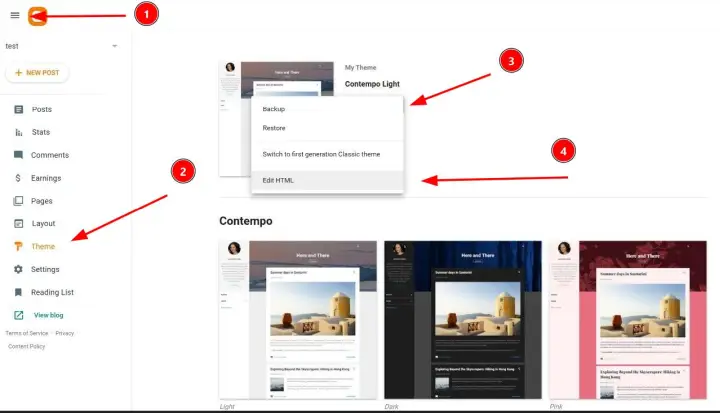
In the Blogger admin panel, go to the Theme section. Next, click the down arrow and select Edit HTML.
Step 1: Go into editing the HTML theme
Use the installation code that you copied in your personal account of the WApp Chat.
Step 2: We take the widget code
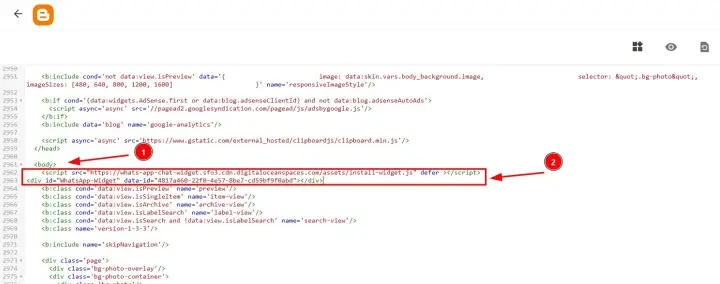
Find the opening
tag in the HTML code and paste the code immediately after it.
Step 3: Add the code
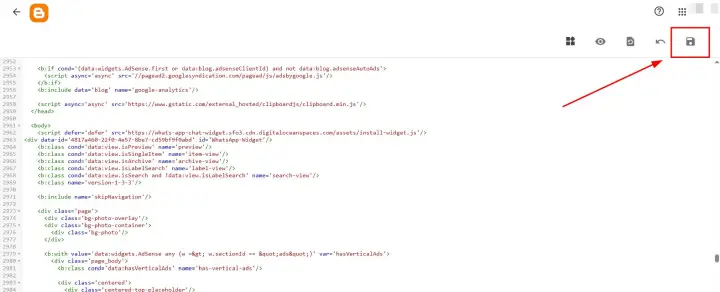
Click Save. Now go through the different pages of your blog: the main page, several articles, and the About the blog page. All should have a WhatsApp chat button. 🎉
Step 4: Save and verify
Great! You have successfully added the Wapp chat widget to Blooger.
Need a Hand?
If you encounter any issues during installation or have questions about customizing your widget, our support team is here to help. Please reach out to us.
support@wapp-chat-widget.com