Add the Wapp Chat Widget to your Drupal website and let visitors start a WhatsApp conversation without looking for your contact details. Below, you will find two setup options: adding the widget to one page or showing it across the whole website.
Before you begin, make sure you've created your widget and copied the installation code from your WApp Chat dashboard
Step-by-step guide for getting the code of the Wapp Chat widget
Choose How You Want to Display the Widget
Install to the single page
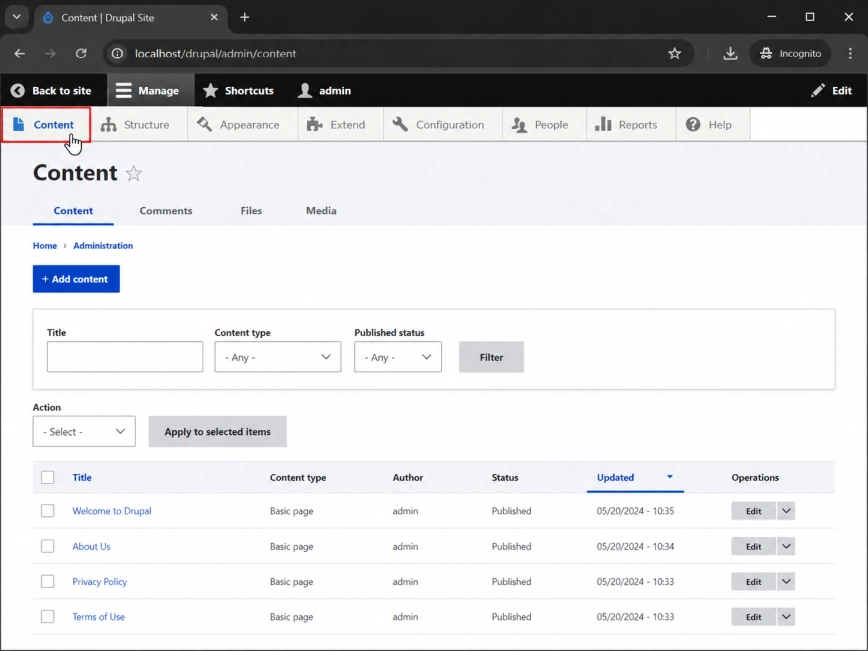
Log in to your Drupal admin panel. In the top admin menu, click Manage, then open Content.
This is the place where Drupal stores your existing pages, articles, and other content items. From here, you can choose the exact page where the WhatsApp widget should appear.
Step 1: Open the Content Section in Drupal
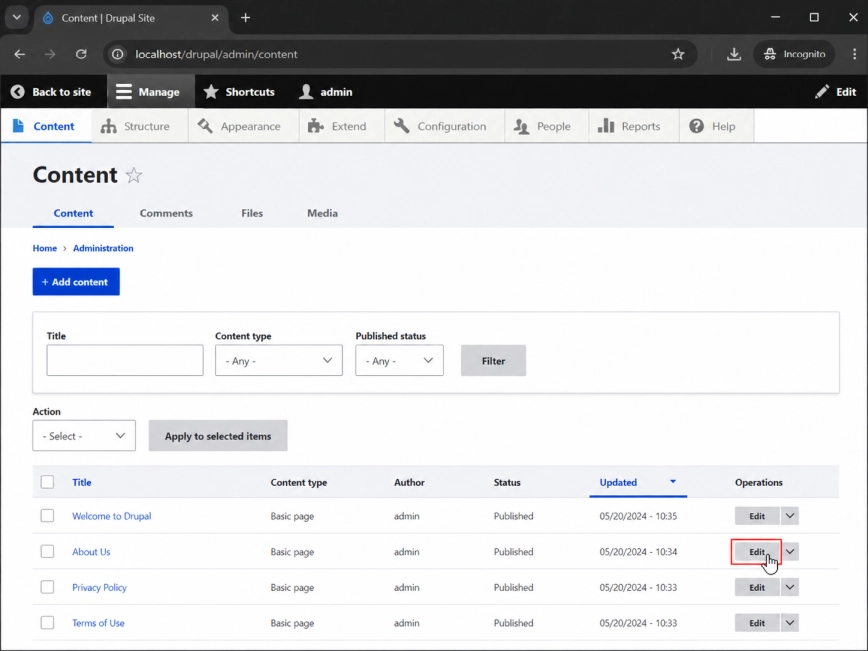
Find the page where you want to add the WhatsApp chat button and click Edit.
A contact page, service page, pricing page, or landing page is usually a good choice. The idea is simple: place the widget where visitors are most likely to have a question before they contact you.
Step 2: Choose the Page for the Widget
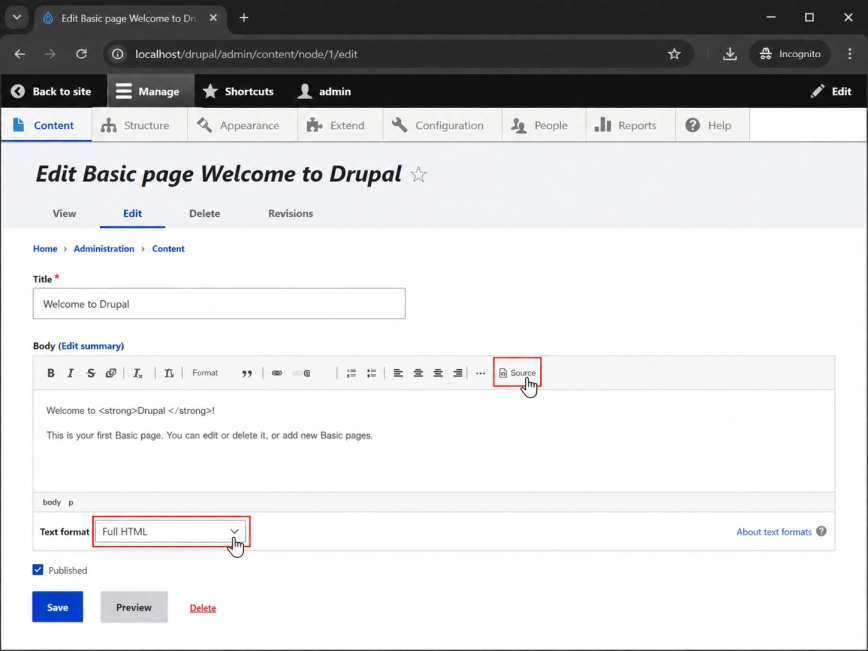
Inside the page editor, change the text format to Full HTML.
Then click Source. This lets you paste the widget as real HTML code, not as visible text inside the page.
Step 3: Switch the Editor to Full HTML
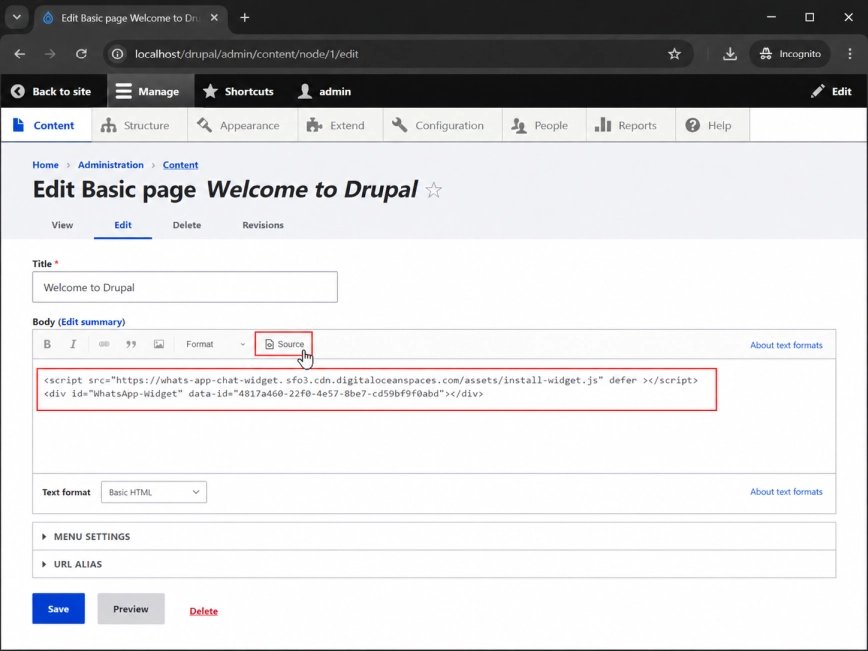
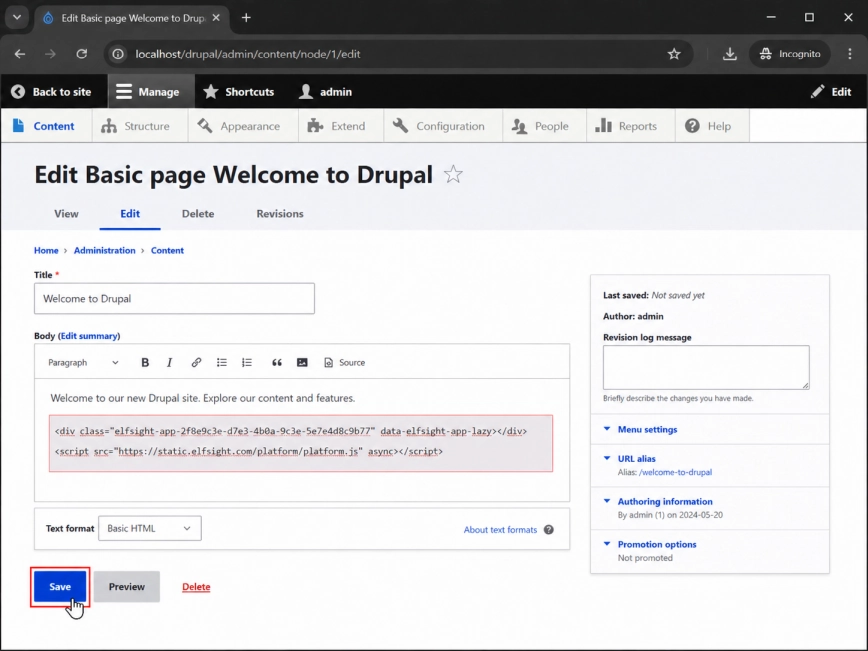
Now paste your Wapp Chat Widget installation code into the page content area.
For a floating WhatsApp button, it is usually better to place the code near the bottom of the content. This keeps the page layout clean while still allowing the widget to load normally.
Step 4: Paste the Wapp Chat Widget Code
Click Save to apply the changes.
Open the page on your live website and check that the WhatsApp chat button appears correctly. If you do not see it right away, refresh the page and clear the Drupal cache.
Step 5: Save the Page and Check the Result
Install to the All pages
Add Your Widget to All Pages
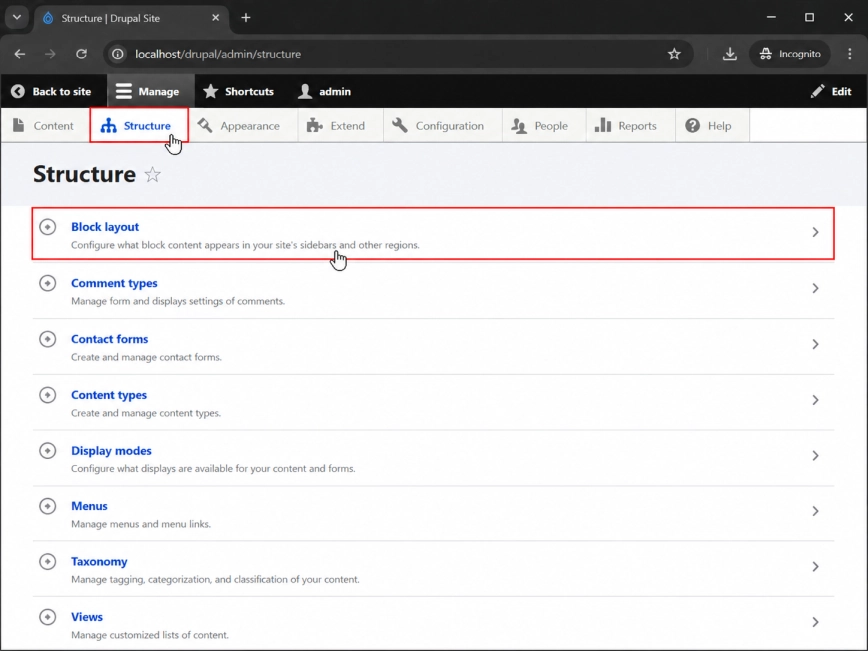
Log in to your Drupal admin panel. In the top menu, click Manage, then go to Structure.
Open Block layout. This section controls which blocks appear in different parts of your Drupal theme.
Step 1: Go to Block Layout
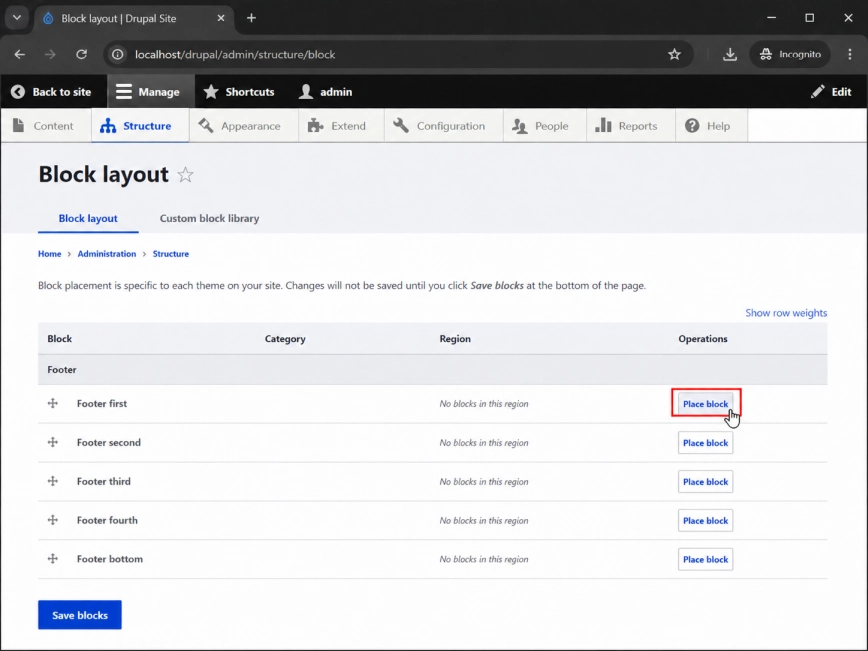
On the Block layout page, scroll down to the Footer section.
Find the Footer first region and click Place block next to it. This is a convenient place to store the Wapp Chat Widget code, while the WhatsApp button itself will still appear as a floating chat widget on your website.
Step 2: Choose the Footer Region
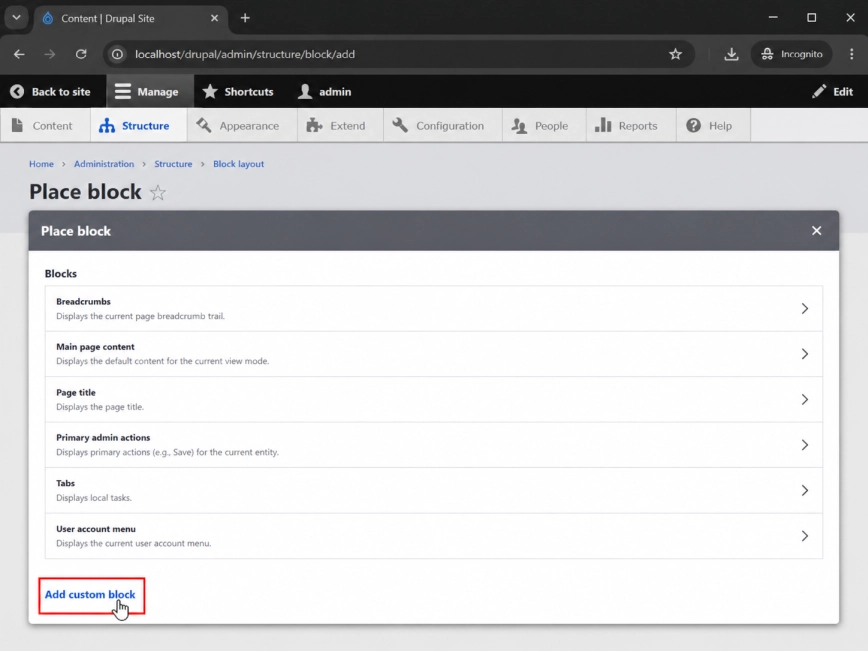
In the block selection window, click Add custom block.
This creates a separate block just for the Wapp Chat Widget, so you do not have to edit each page one by one.
Step 3: Create a Custom Block
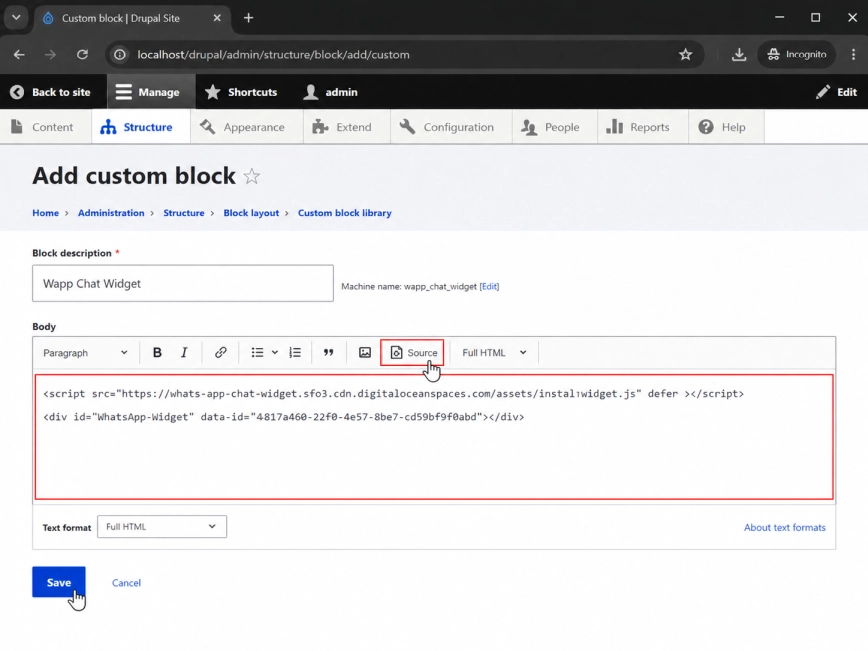
Give the block a clear admin name, for example Wapp Chat Widget.
Change the text format to Full HTML, open Source mode, and paste the widget installation code into the block body.
Step 4: Add the Wapp Chat Widget Code to the Block
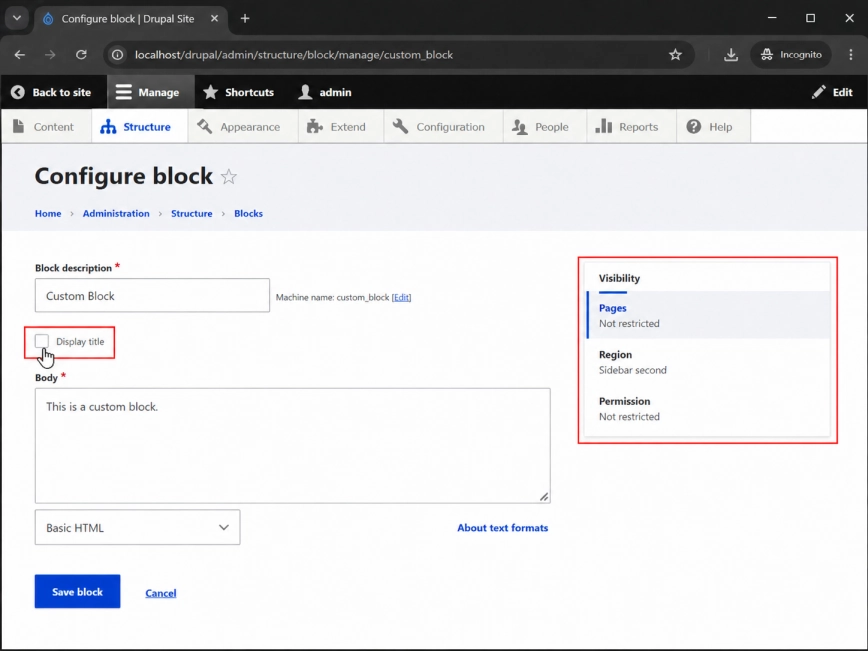
Uncheck Display title. This keeps the block name from showing on the public website.
Then check the visibility settings. If you want the WhatsApp button on the entire Drupal website, keep the block available for all pages where the widget should be shown.
Step 5: Hide the Block Title and Set Visibility
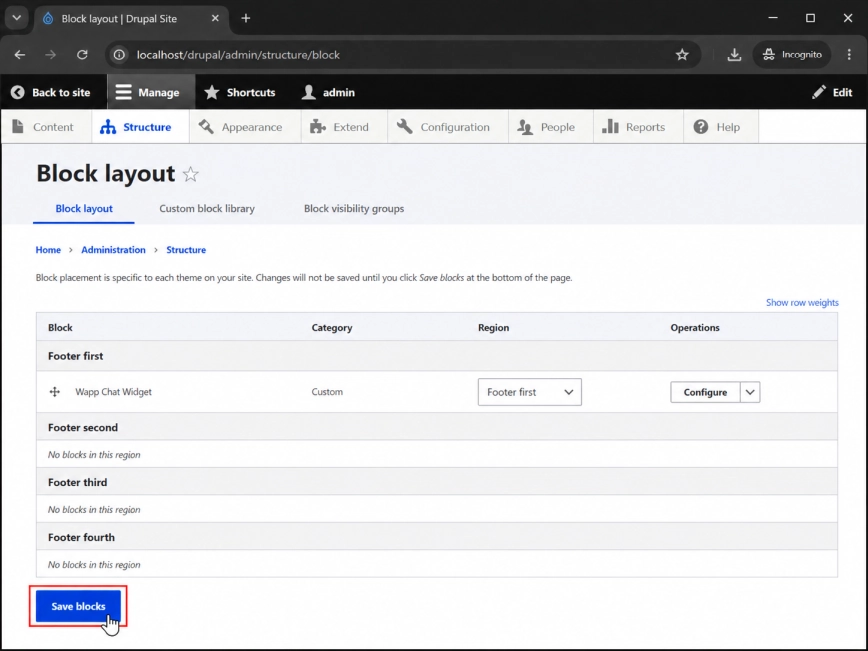
Click Save block. After that, return to the Block layout page and click Save blocks.
Now open a few pages of your website. If everything was added correctly, the WhatsApp chat button will appear across your Drupal site.
Step 6: Save the Block Settings
Done. Your Wapp Chat Widget should now be visible on your Drupal website.
Need a hand?
If the widget does not show up after saving, clear the Drupal cache and make sure the code was added in Full HTML and Source mode. You can also contact our support team and we will help you finish the setup.
support@wapp-chat-widget.com