Want to make it easier for Ecwid shoppers to message you on WhatsApp? This guide walks you through adding the Wapp Chat Widget to one selected page or showing it across your whole Ecwid website.
Before you begin, make sure you've created your widget and copied the installation code from your WApp Chat dashboard
Step-by-step guide for getting the code of the Wapp Chat widget
Choose How You Want to Display the Widget
Install to the single page
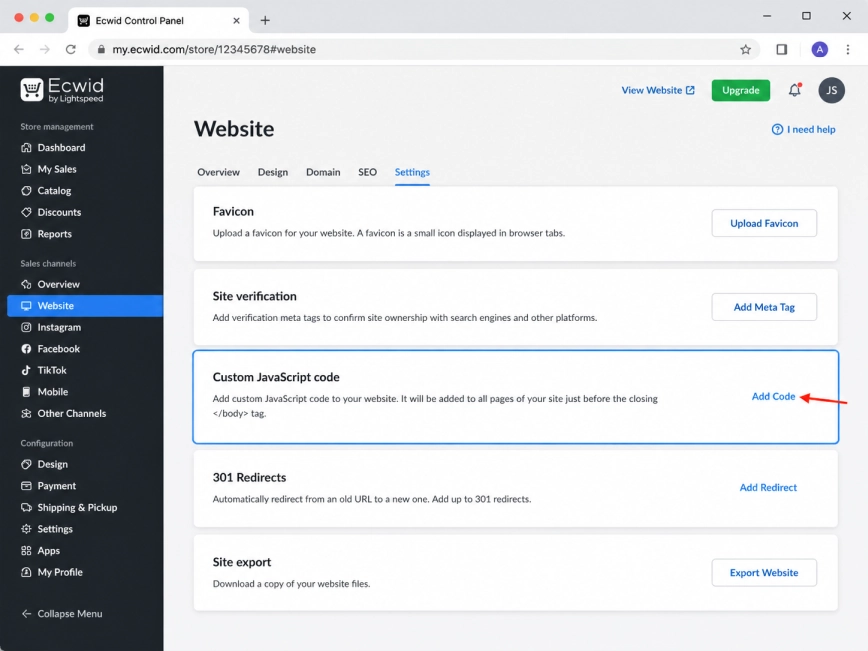
Log in to your Ecwid admin panel and open Website from the left-hand menu.
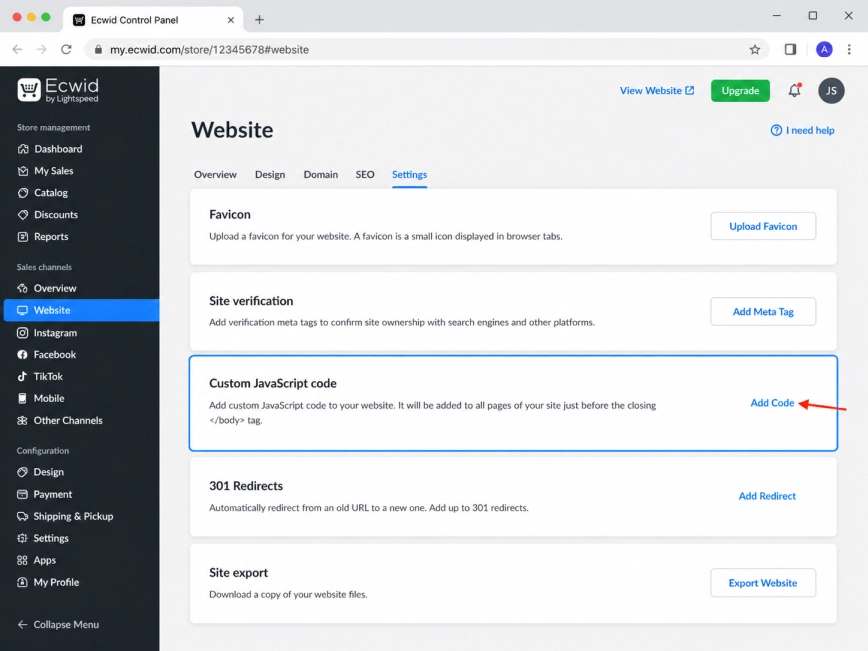
Scroll down until you see the Custom JavaScript code section, then click Add Code.
For this setup, you will use this section only for the script part of the Wapp Chat Widget code. The widget itself will be connected to a specific product or category page in the next steps.
Step 1: Open the Custom JavaScript Code Section
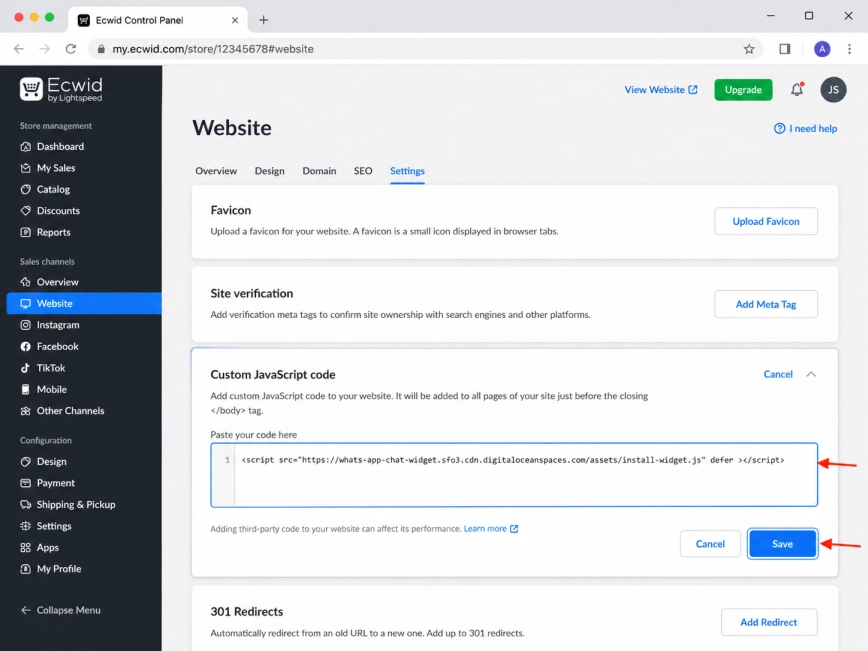
Paste only the first line of your Wapp Chat Widget installation code into the Custom JavaScript code field.
Click Save. This script allows the widget to load on your Ecwid storefront, while the actual widget container will be placed on the page where you want the button to appear.
Please note: Ecwid may show the Custom JavaScript code section only on certain paid plans. If you do not see it in your dashboard, check your current plan settings.
Step 2: Add the Script Line of the Wapp Chat Code
Next, go to Catalog in your Ecwid dashboard.
To add the WhatsApp widget to a product page, open Products, choose the product you need, and click Edit Product.
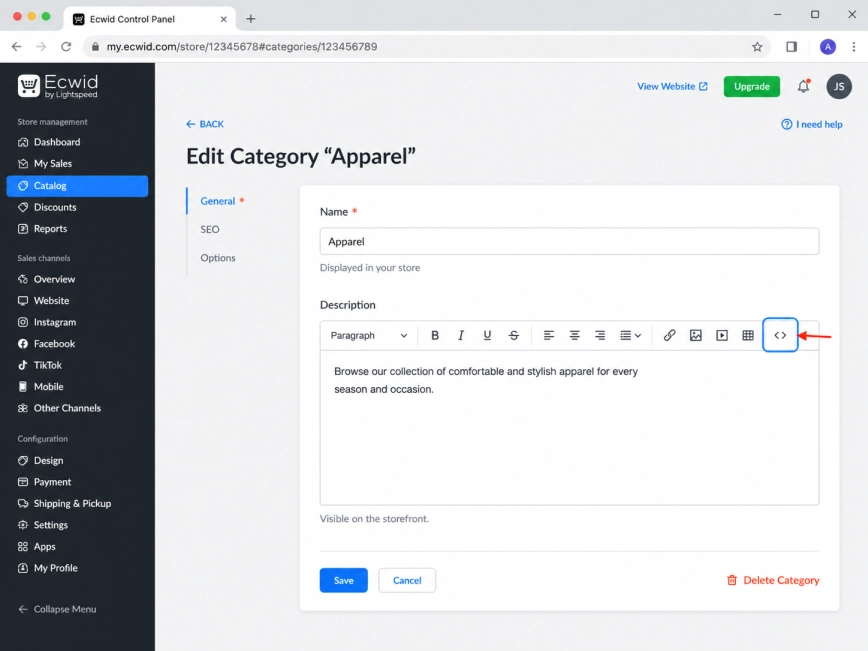
To place it on a category page instead, open the category you want to edit. The process is almost the same - you just need to choose the exact page where the chat button should appear.
Step 3: Open the Product or Category Page
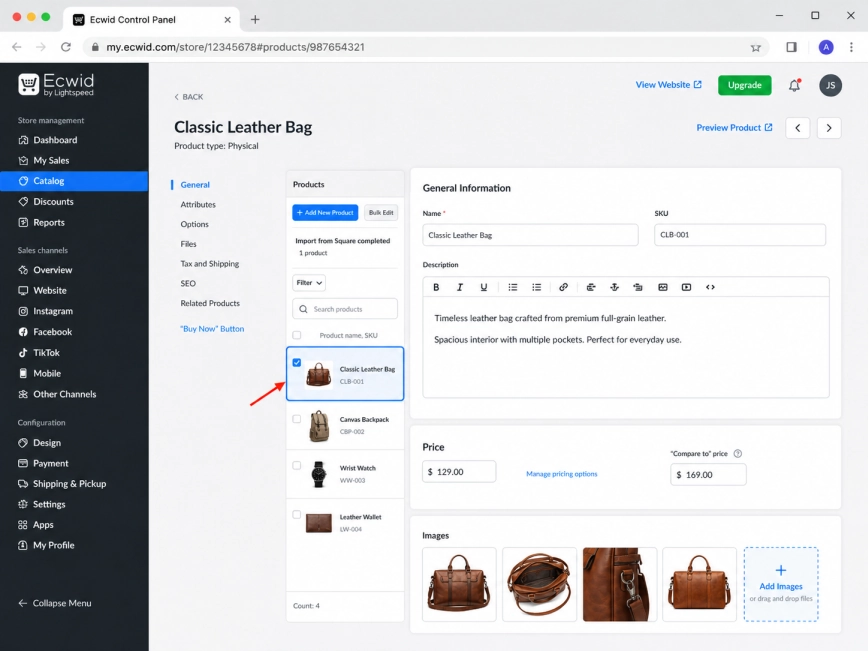
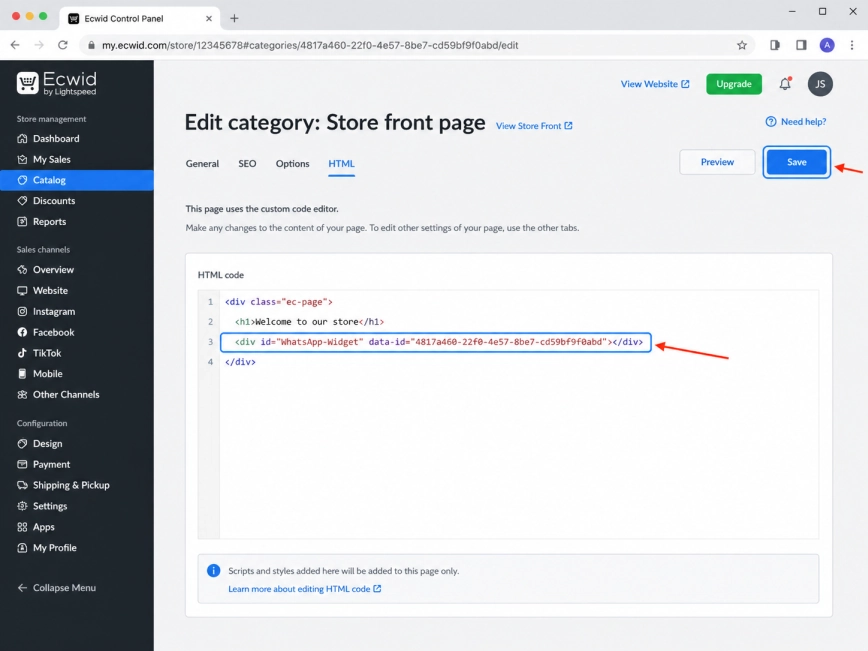
Find the description field for the selected product or category.
Switch the editor to HTML mode before pasting the widget container. This keeps Ecwid from treating the code as ordinary text.
For this single-page method, avoid pasting the full installation code into the description. You have already added the script in the previous step, so this field only needs the widget container line.
Step 4: Switch the Description Editor to HTML Mode
Paste the second line of your Wapp Chat Widget installation code into the HTML field.
Save the product or category page. After that, open it on your storefront and check that the floating WhatsApp button appears where expected.
Step 5: Paste the Widget Container and Save the Page
Install to the All pages
Add Your Widget to All Pages
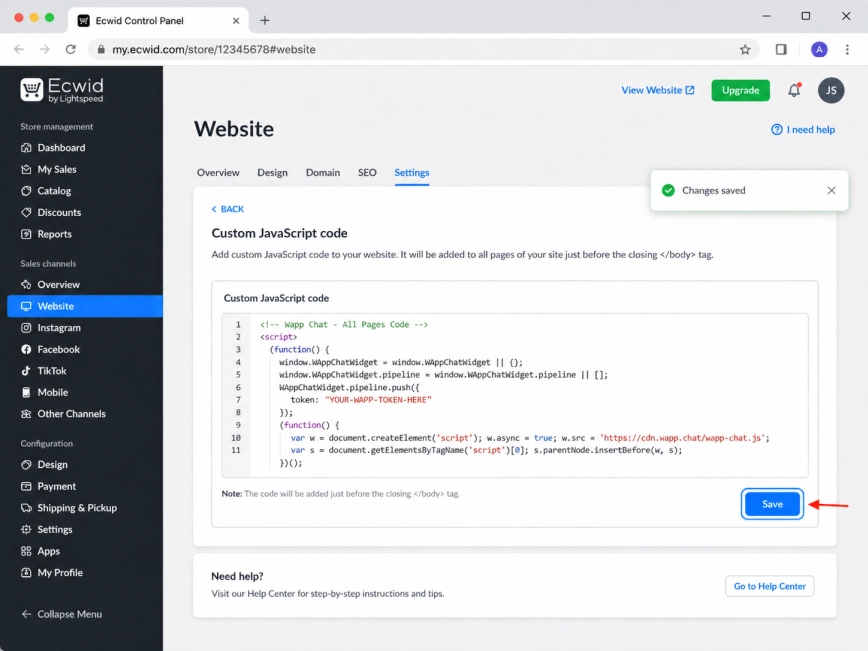
Log in to your Ecwid admin panel and open Website from the left-hand menu.
Choose this method if you want the WhatsApp chat button to be available throughout your Ecwid store, not just on one product or category page.
Step 1: Open the Website Section in Ecwid
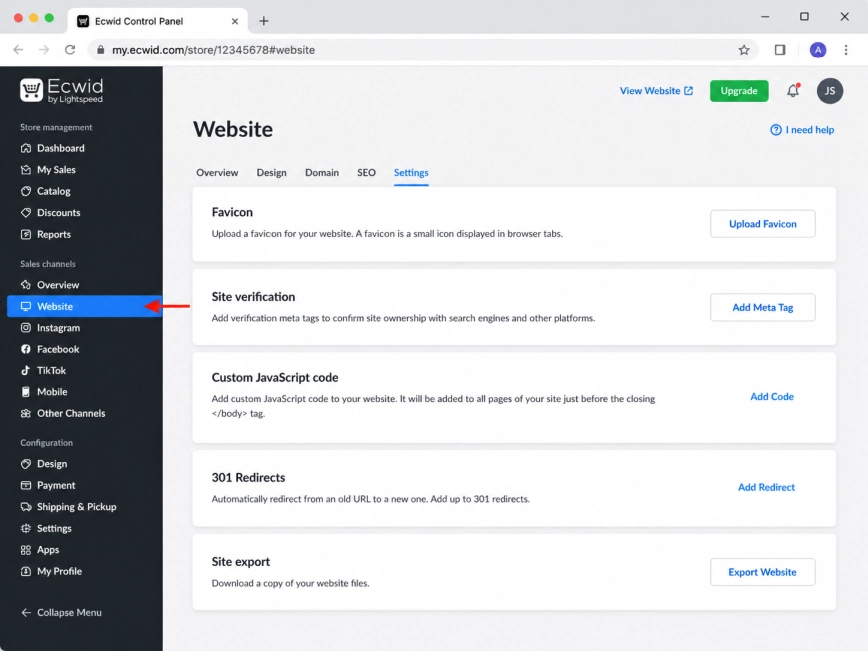
Scroll down to the Custom JavaScript code section.
Click Add Code to open the field for your custom script.
This is the most convenient place for a floating WhatsApp widget that should load across the entire Ecwid website.
Step 2: Open Custom JavaScript Code
Paste the full Wapp Chat Widget installation code into the Custom JavaScript code field.
For an all-pages setup, both lines should stay together in this field. That way, Ecwid can load the widget script and display the floating button across your storefront.
Step 3: Paste the Full Wapp Chat Widget Code
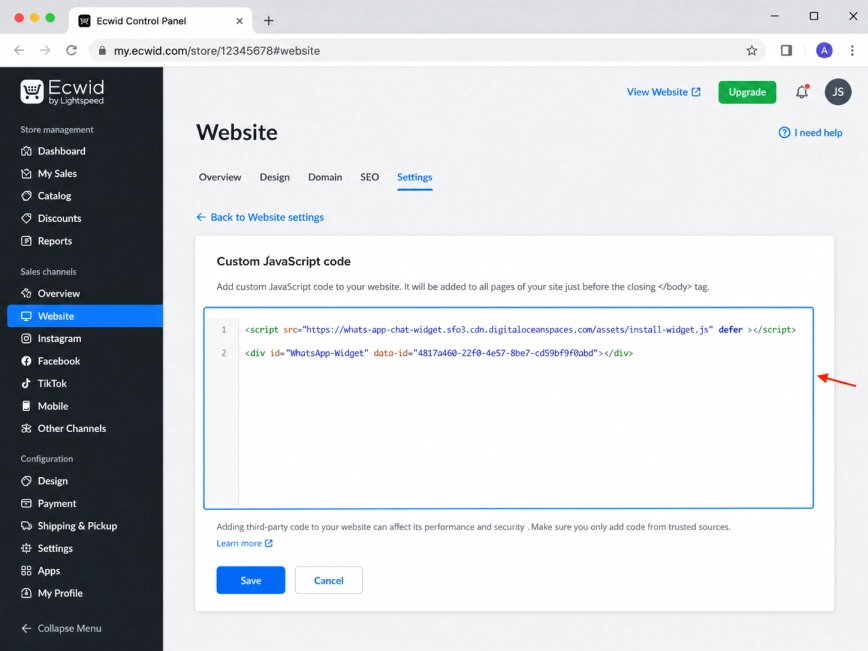
Click Save to apply the code.
Then open your Ecwid store in a new browser tab and check a few different pages. The WhatsApp button should stay visible as visitors browse your website.
Step 4: Save the Changes
All set. Your Wapp Chat Widget should now be working on your Ecwid website.
If you added the widget to one page, open that exact product or category page and make sure the WhatsApp button appears there.
If you installed it across the whole website, check several pages of your store to confirm that the widget loads everywhere.
Need help with the setup?
Contact our support team and we will help you get the widget running.
support@wapp-chat-widget.com