Want customers to message you on WhatsApp while browsing your PrestaShop store? This guide shows how to add the Wapp Chat Widget to one page or make it appear across your whole website.
Before you begin, make sure you've created your widget and copied the installation code from your WApp Chat dashboard
Step-by-step guide for getting the code of the Wapp Chat widget
Choose How You Want to Display the Widget
Install to the single page
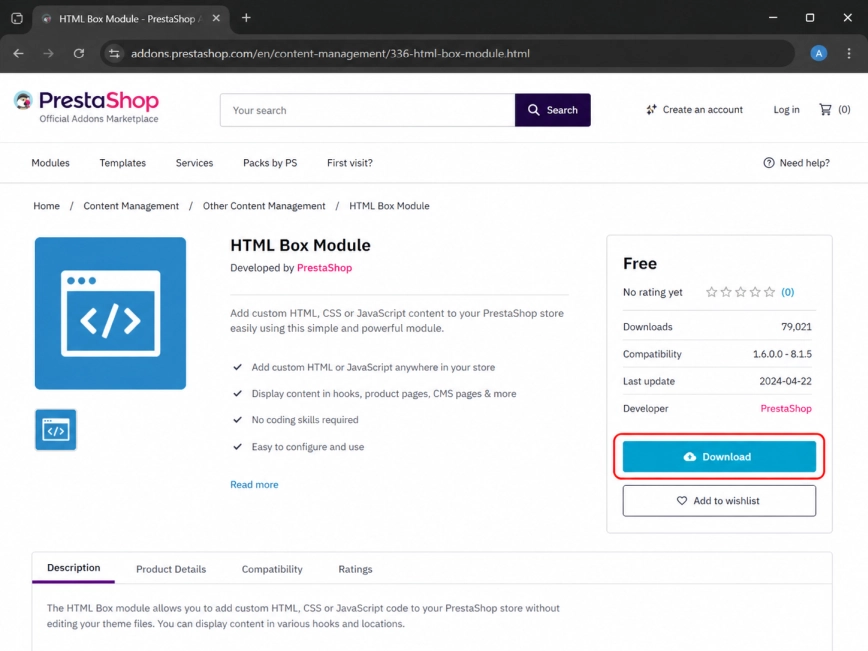
PrestaShop can be quite strict with custom scripts, so adding the widget through a regular page editor may not work properly. The easiest way to avoid this is to use the PrestaShop HTML Box module.
Download the module version that matches your PrestaShop setup before moving to the next step.
Step 1: Install the PrestaShop HTML Box Module
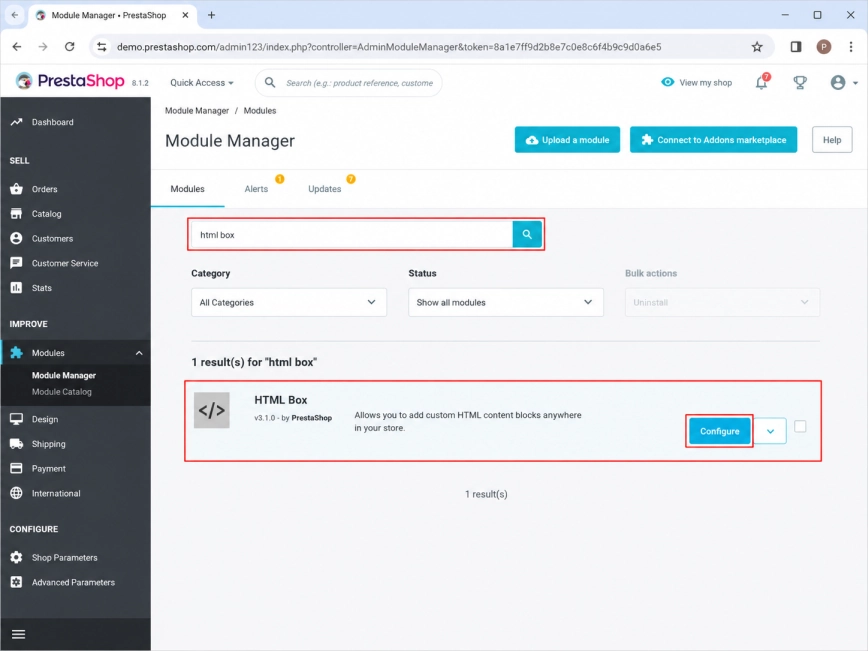
Log in to your PrestaShop admin panel. From the left menu, open Modules, then go to Module Manager.
Click Upload a module and add the HTML Box module .zip file. When the installation is complete, click Configure to open the module settings.
Step 2: Upload the Module to Your Store

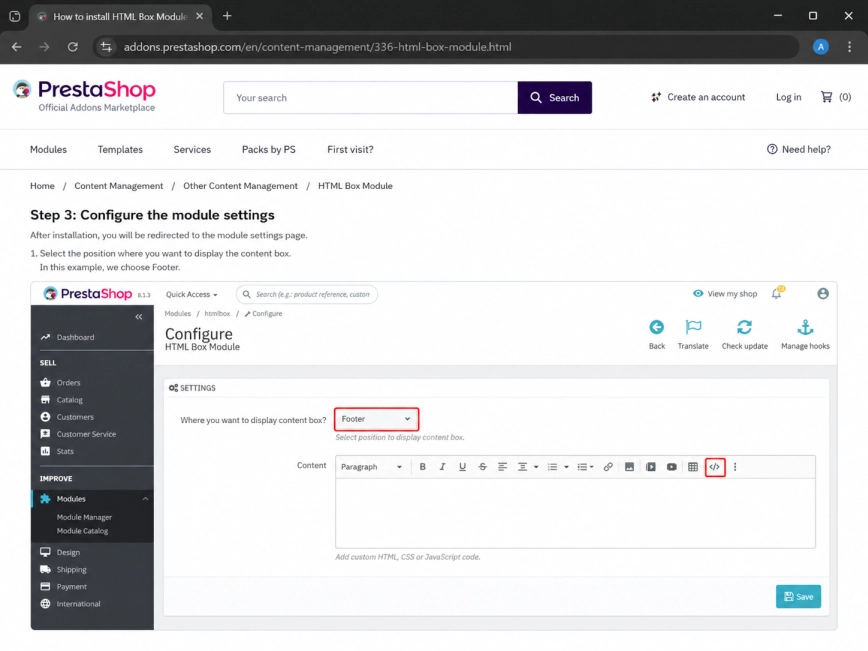
Inside the HTML Box module settings, look for the field called Where you want to display content box? and choose Footer.
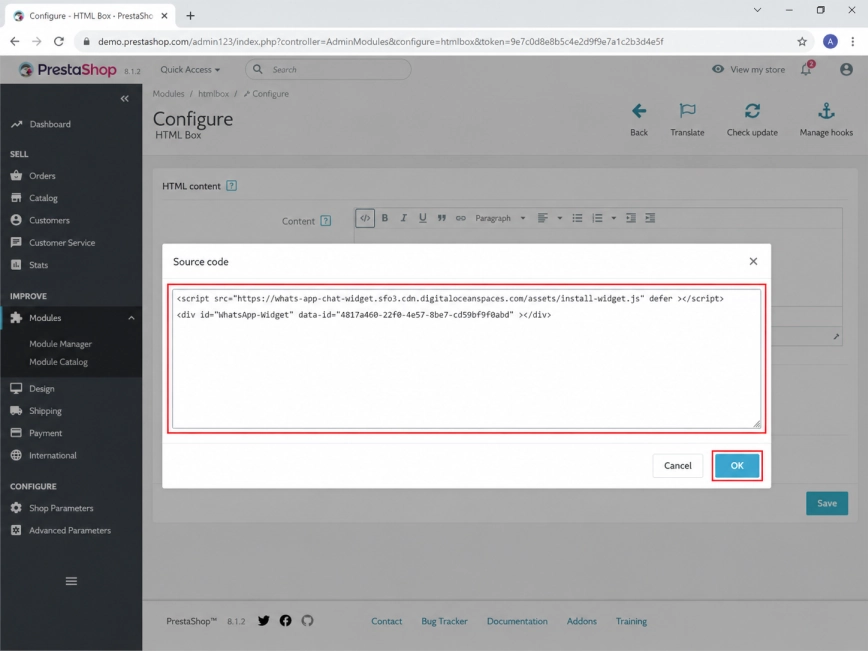
After that, scroll down to the content field and click the Source Code icon. This opens the editor where you can safely add the widget script.
Step 3: Place the Widget Script in the Footer
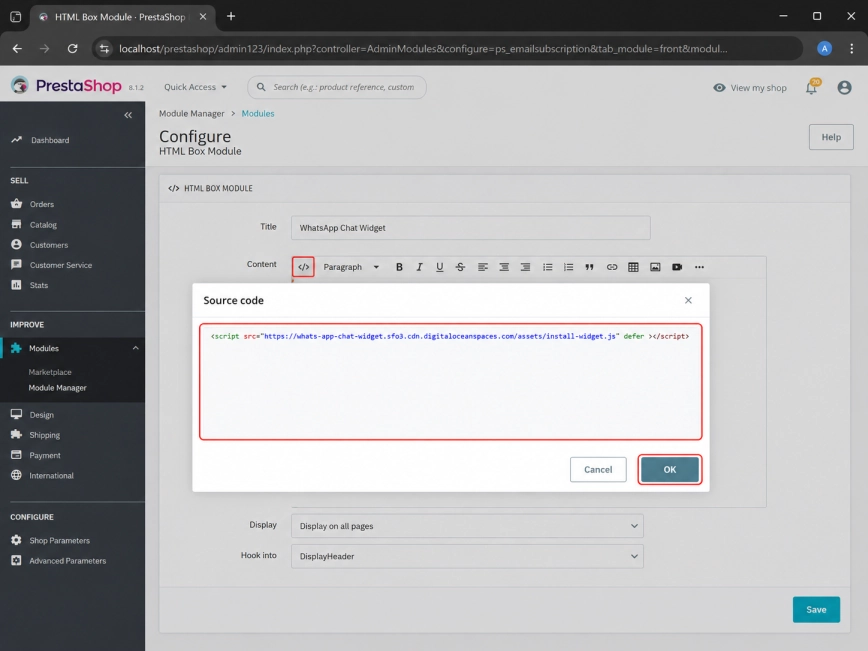
Paste the script part of your Wapp Chat Widget code into the source code window.
Click Ok, then save the module settings so PrestaShop keeps the script in the footer.
Step 4: Add the First Part of the Wapp Chat Code
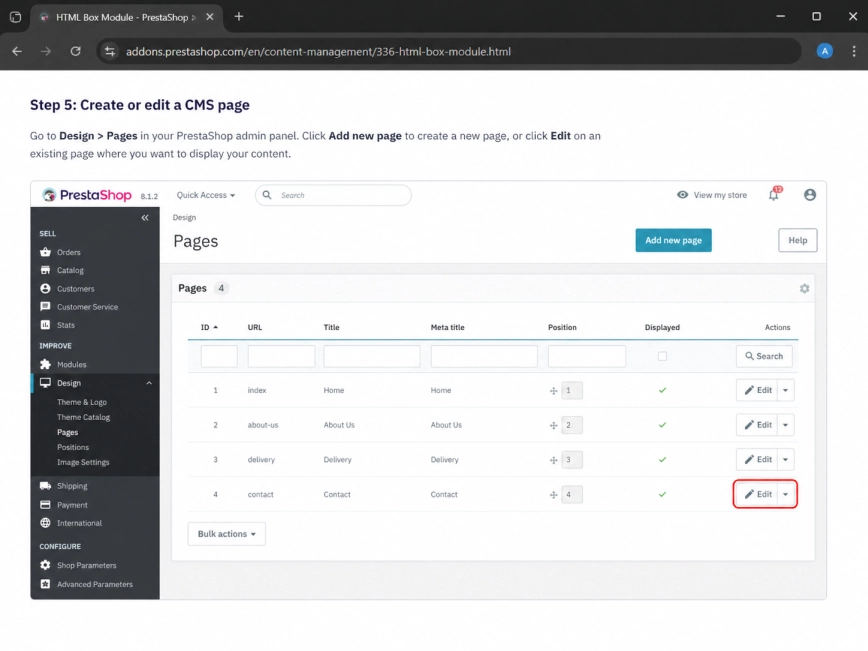
Now choose the page where you want the WhatsApp widget to appear. In your PrestaShop admin panel, go to Design, then open Pages.
Find the page you need and click Edit.
Step 5: Open the Page for Your Widget
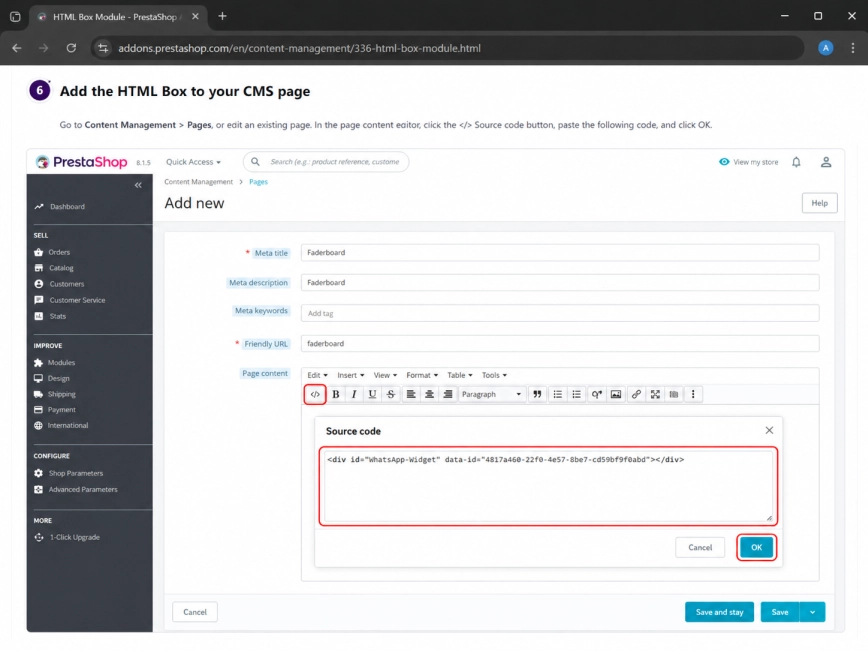
In the page editor, scroll to the content area and open the Source Code editor.
Paste the widget container code into the page content.
Click Ok, then save the page. The widget will be connected only to this selected page.
Step 6: Add the Widget Container to the Page
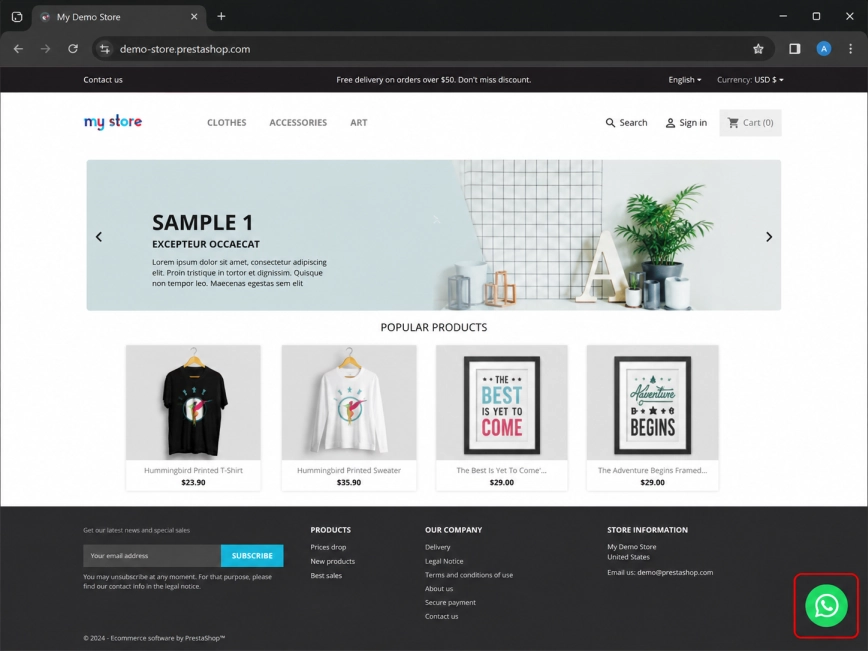
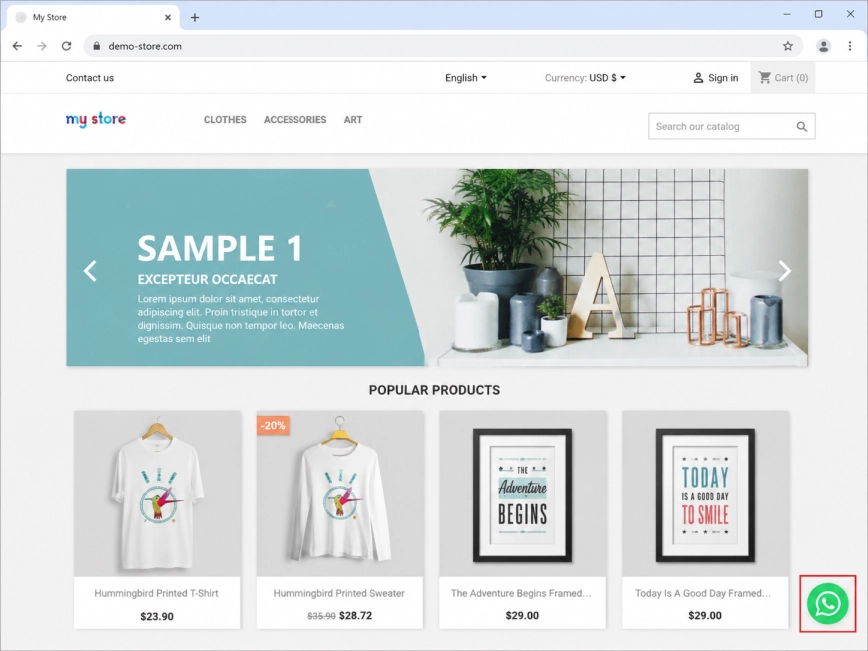
Open the page on your live PrestaShop website and check whether the WhatsApp chat button appears as expected.
If the widget does not show up, or if PrestaShop changes the code after saving, go to Shop Parameters, open General, and try disabling Use HTMLPurifier Library. Then paste the code again and save your changes.
Step 7: Check the Widget on the Live Page
Install to the All pages
Add Your Widget to All Pages
To display the Wapp Chat Widget across your whole PrestaShop store, start with the same HTML Box module. It lets you add custom code in a place that can load on every page.
Install the module, then click Configure to open its settings.
Step 1: Install and Open the HTML Box Module
In the module settings, find the dropdown labeled Where you want to display content box? and select Footer.
This works well for a floating WhatsApp chat button because the widget can load globally without being attached to a specific product, category, or content block.
Step 2: Choose Footer as the Display Location

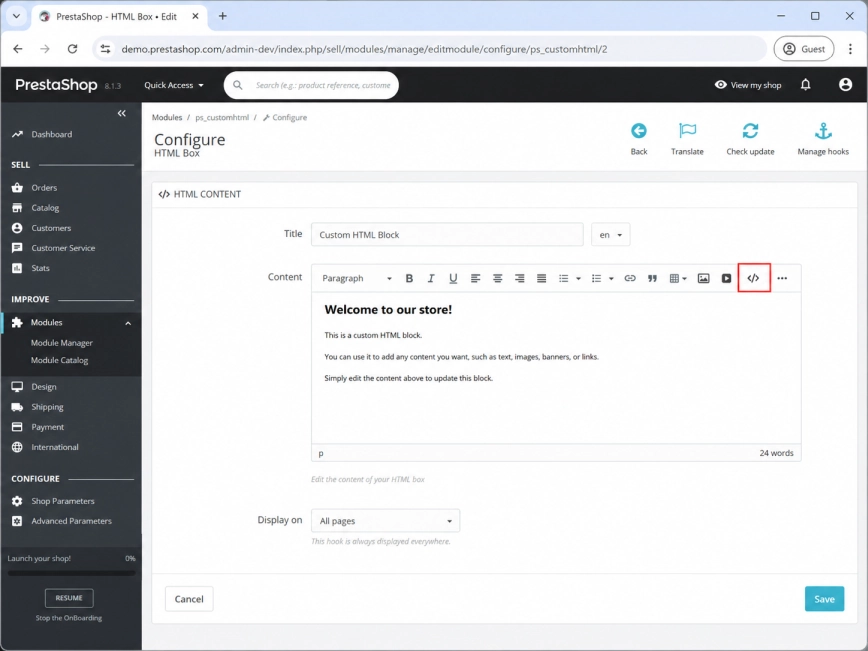
Scroll to the content field in the HTML Box module.
Click the Source Code icon to open the HTML editor. This is where you will paste the full Wapp Chat Widget installation code.
Step 3: Open the Source Code Editor
Add the full Wapp Chat Widget code into the source code window.
Click Ok, then save the module settings. Once saved, the widget code will be loaded from the footer of your store.
Step 4: Paste the Full Wapp Chat Widget Code
Open your PrestaShop website and visit a few different pages, for example the home page, a product page, and a category page.
The WhatsApp chat button should now appear across your store.
If you do not see the widget, or if the code is removed after saving, open Shop Parameters -> General and try turning off Use HTMLPurifier Library. After that, add the code again and save the module.
Step 5: Check the Widget Across Your Store
All set. Your Wapp Chat Widget should now be ready on your PrestaShop website.
Need a hand with setup?
Contact our support team and we will help you get the widget working on your store.
support@wapp-chat-widget.com