Adding a WhatsApp chat widget to your Shopify store is a great way to connect with customers instantly. This guide will show you how to quickly install the Wapp widget on your site. Just copy your unique installation code, and let's get started!
Before you begin, make sure you've created your widget and copied the installation code from your WApp Chat dashboard
Step-by-step guide for getting the code of the Wapp Chat widget
Choose How You Want to Display the Widget
Install to the single page
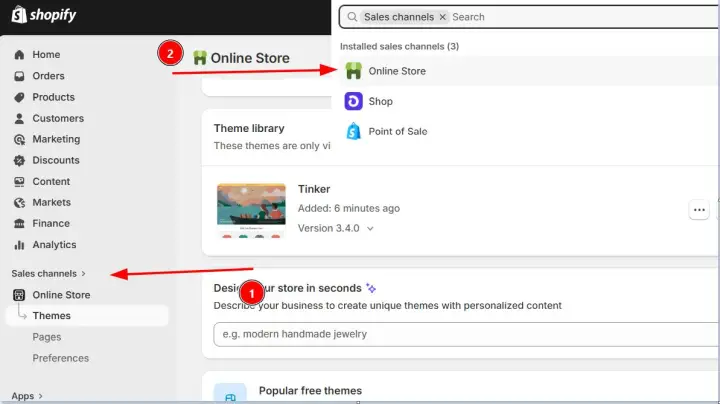
Log in to your Shopify admin panel. In the left sidebar, navigate to Sales Channels and click Online Store.
Step 1: Open the Online Store Editor
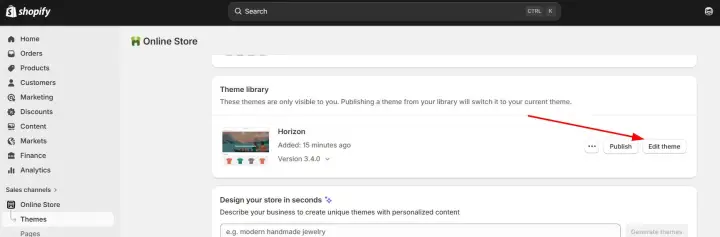
On the Themes page, find your current theme and click the Customize button.
Step 2: Access the Theme Editor
The visual editor will open, usually on your homepage by default. To select a different page (e.g., a product or collection page), use the drop-down list at the top of the page.
Once on the desired page, decide where you want the widget to appear.
Click the Add Section button.
From the list of sections, choose Custom liquid.
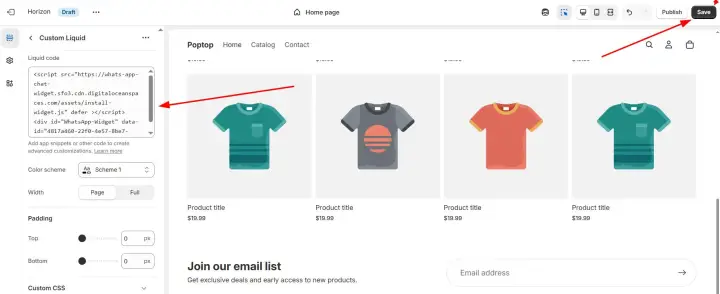
Step 3: Add the Code to a Liquid Section

A new Custom liquid block will appear. Click on it to open its settings, and paste your unique Wapp widget installation code into the provided box. Finally, click Save in the top right corner.
Step 4: Paste Your Widget Code and Save
Install to the All pages
If you want the WhatsApp widget to appear site-wide (e.g., on every product, collection, and page), you need to add the code to your theme's main layout file.
Just like in the first method, log in to your Shopify admin, go to Sales Channels, and click Online Store.
Step 1: Navigate to the Online Store

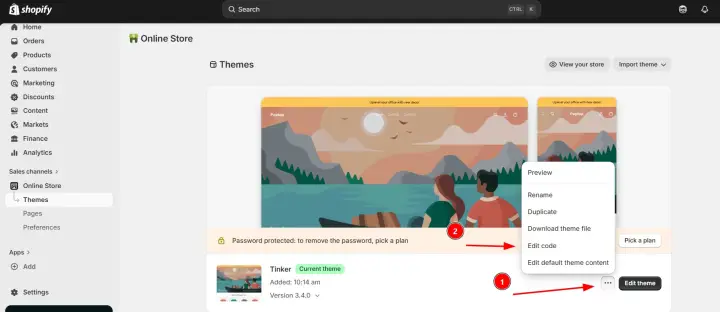
This time, instead of hitting Customize, click the ... button (Actions menu) for your current theme and select Edit Code.
Step 2: Open the Theme Code Editor
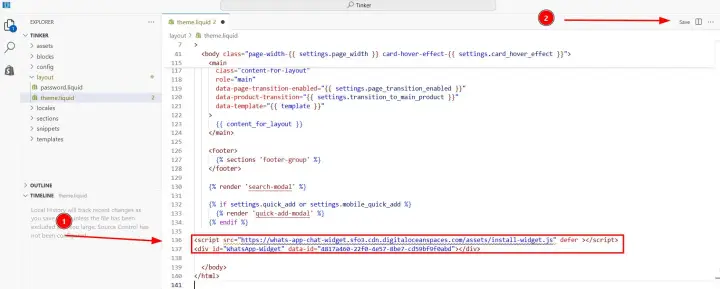
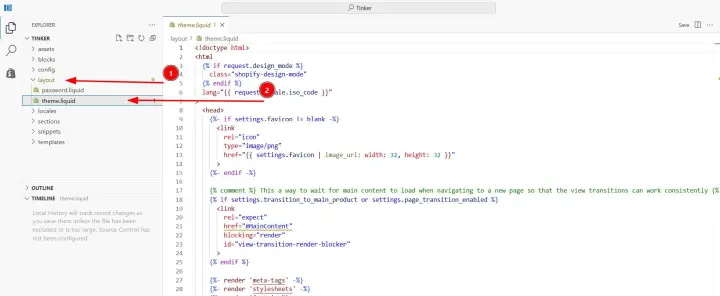
In the code editor, look for the Layout section on the left. Click on the file named theme.liquid . This is the main template that controls the layout for every page.
Step 3: Open the Theme Layout File
In the theme.liquid file, scroll down until you find the closing
Step 4: Paste the Code and Save