This guide will walk you through the simple steps to add your Wapp Chat Widget to your Webflow website. You can choose to add it to a single page or across your entire site. Just grab your unique installation code from your Wapp Chat Widget dashboard and follow the instructions below.
Before you begin, make sure you've created your widget and copied the installation code from your WApp Chat dashboard
Step-by-step guide for getting the code of the Wapp Chat widget
Choose How You Want to Display the Widget
Install to the single page
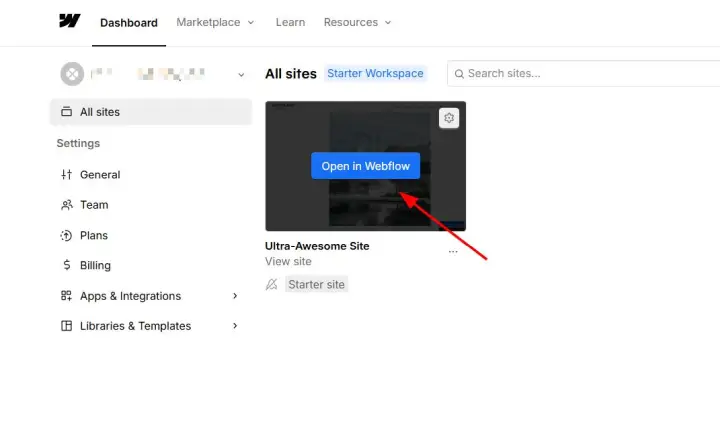
Log in to your Webflow dashboard. Find the website you want to edit, hover over it, and click Open in Webflow.
Step 1: Open Your Webflow Project
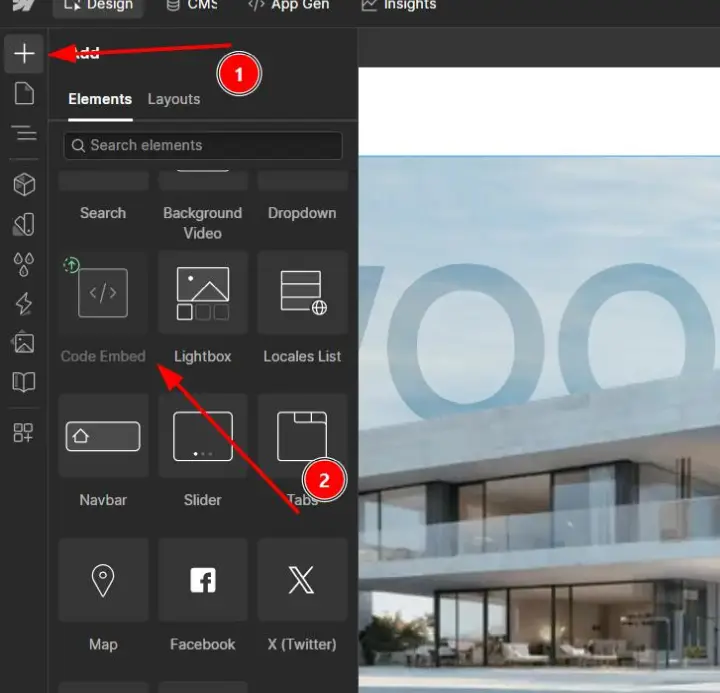
Navigate to the page where you want the widget. Click the + (plus) icon in the left-hand panel to open the Add Elements menu. Find the Code Embed element and drag it onto the canvas at the exact spot where you want the WhatsApp widget to appear.
Please note that the Embed Code element is a feature reserved for Webflow paying subscribers. Access to this functionality requires an active paid plan; it is not available on free accounts.
Step 2: Add a Code Embed Element
Click the Code Embed element on your page to open the editor. Paste your Wapp Chat Widget installation code into the window. Click Save & Close.
Step 3: Paste the Installation Code
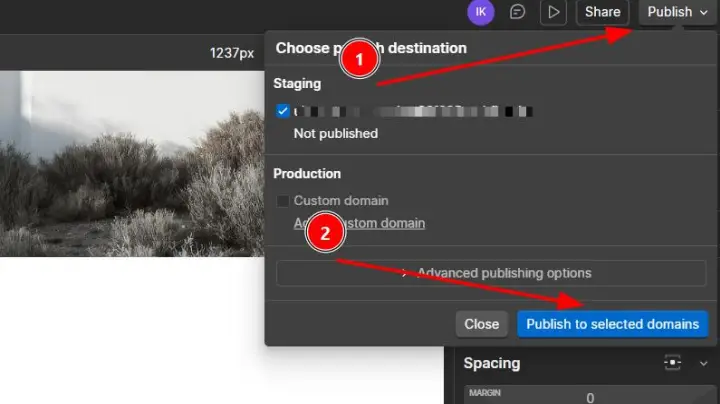
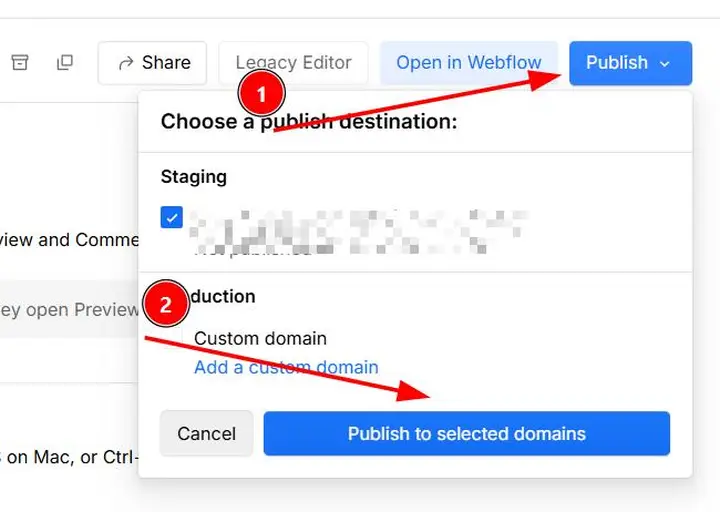
Step 4: Publish Your Site Once you've placed the code, click the Publish button in the top-right corner. Select the domain you want to publish to and confirm. Your WhatsApp widget is now live on that specific page!
Step 4: Publish Your Site
Install to the All pages
🌐 Add Your Widget to All Pages
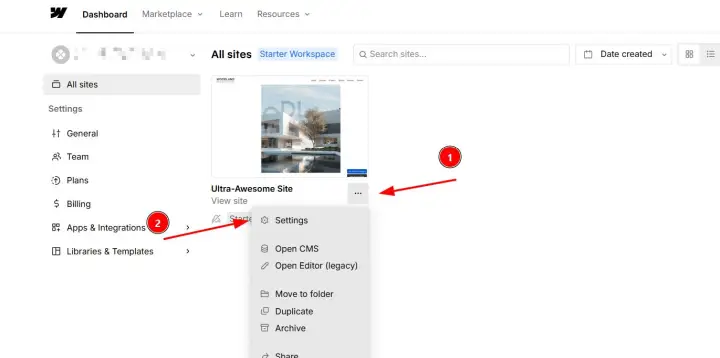
Step 1: Go to Webflow Project Settings From your Webflow dashboard, find the correct website. Click the three dots (...) icon on the project card and select Settings.
Step 1: Go to Webflow Project Settings
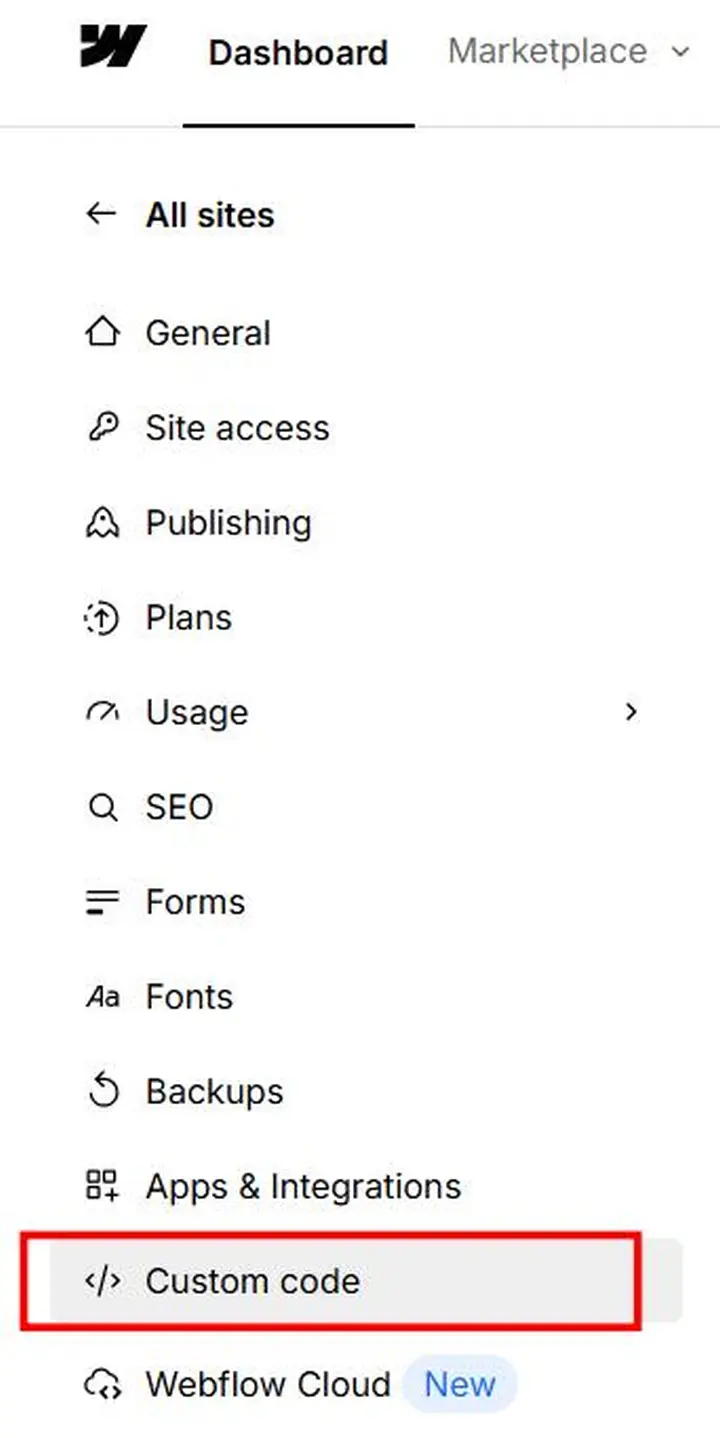
In the Settings menu, click on the Custom Code tab in the left sidebar.
Step 2: Access the Custom Code Section
Paste your Wapp Chat Widget installation code here. Click Save at the.
Step 3: Paste Code in the Head Section
Go back to the project dashboard or open the Designer, click the Publish button, and select your domains. Your WhatsApp widget will now be active across your entire Webflow site.
Step 4: Publish Your Changes
All done! Your Wapp widget is now installed and will appear on every page of your Webflow website.
Need a Hand?
If you encounter any issues during installation or have questions about customizing your widget, our support team is here to help. Please reach out to us.
support@wapp-chat-widget.com